Creating a Cloudflare SSL Certificate using certbot
Learn how to create a SSL certificate using certbot and Cloudflare on a Debian 12 container.

Introduction
This guide will show you how to create a SSL certificate using certbot and Cloudflare on a Debian 12 container.
Prerequisites
- A Debian 12 server or container
- A Cloudflare account
- A domain
It is necessary to have a domain that is pointing to Cloudflare as the DNS provider.
Once the domain is pointing to Cloudflare, you can create a Cloudflare token.
Creating a Cloudflare token
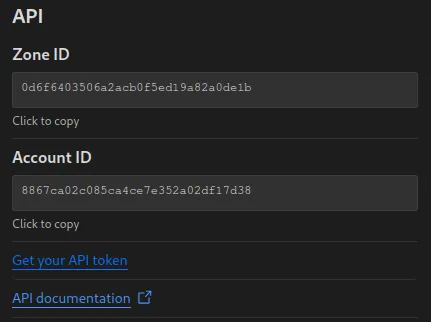
To create a Cloudflare token, you need to go to the Cloudflare dashboard and scroll down to the API section.
Click on “Get your API token”.

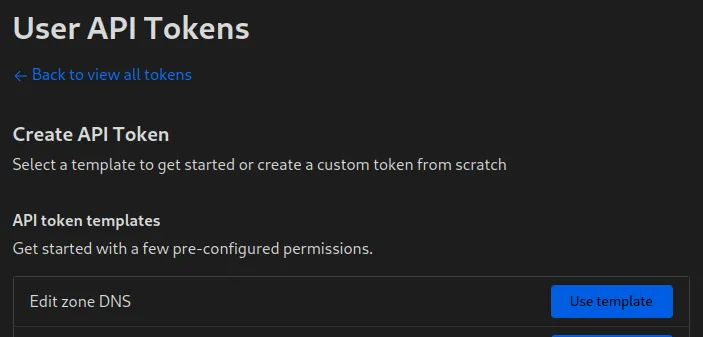
Now you need to create a token.

Cloudflare’s API tokens can be restricted to specific domains and operations they are therefore the recommended authentication option.
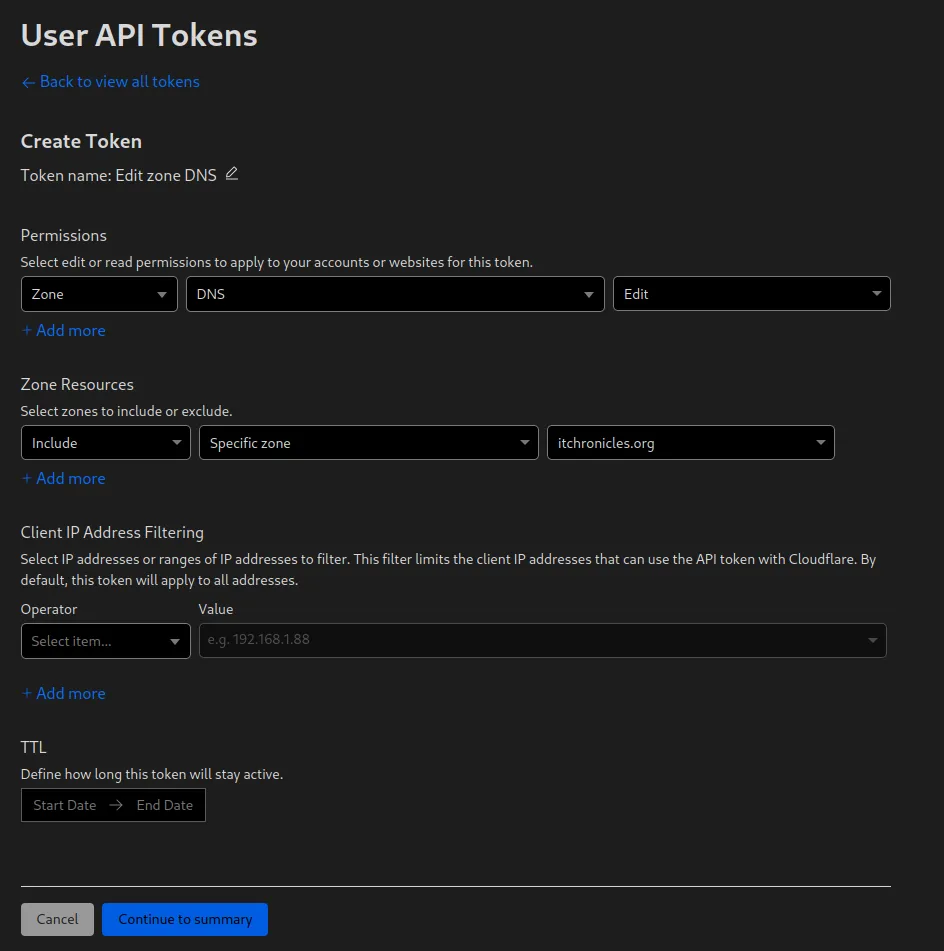
The Token needed by Certbot requires Zone:DNS:Edit permissions for only the zones you need certificates for.
Click on “Create Token” and then “Use template” next to “Edit zone DNS”.

now you need to configure the token. There are multiple options to restrict the tokens. Permissions to a specific zone or all zones, Client API Address and the time it is valid for.

After the token is created, you can use it to get a certificate.
Warning: The token is only displayed once and cannot be retrieved later. So better save it somewhere safe ;)
Installing certbot
apt update
apt install python3 python3-venv libaugeas0
python3 -m venv /opt/certbot/
/opt/certbot/bin/pip install --upgrade pip
/opt/certbot/bin/pip install certbot certbot-dns-cloudflare
Link certbot to the system path
ln -s /opt/certbot/bin/certbot /usr/bin/certbot
Creating the certificate
First, let’s create a directory for the secrets
mkdir -p ~/.secrets/certbot
Now create the cloudflare.ini file. Because of the ~/ this example saves the file in the home directory of the user.
cat <<EOF > ~/.secrets/certbot/cloudflare.ini
dns_cloudflare_api_token = "your_api_token_here"
EOF
certbot will display a warning if it detects that the credentials file can be accessed by other users. To fix this, you can change the permissions of the file.
chmod 600 ~/.secrets/certbot/cloudflare.ini
Now you can finally create the certificate!
certbot certonly --dns-cloudflare --dns-cloudflare-credentials ~/.secrets/certbot/cloudflare.ini -d cert-test.itchronicles.org
Let’s break down the command:
certbot certonly: This tells certbot to only obtain the certificate without installing it--dns-cloudflare: Specifies that we want to use the Cloudflare DNS challenge for domain validation--dns-cloudflare-credentials: Points to the file containing our Cloudflare API token-d cert-test.itchronicles.org: Specifies the domain name for the certificate we want to create
Typically certbot will save the certificates in /etc/letsencrypt/live/
to validate the certificate, you can use the certbot certificates command.
certbot certificates
this will display the certificates and their status.